
Friday, December 31, 2021
Eaglemoss 1:8 Scale Aston Martin DB5, Part 18, Bullet Shield

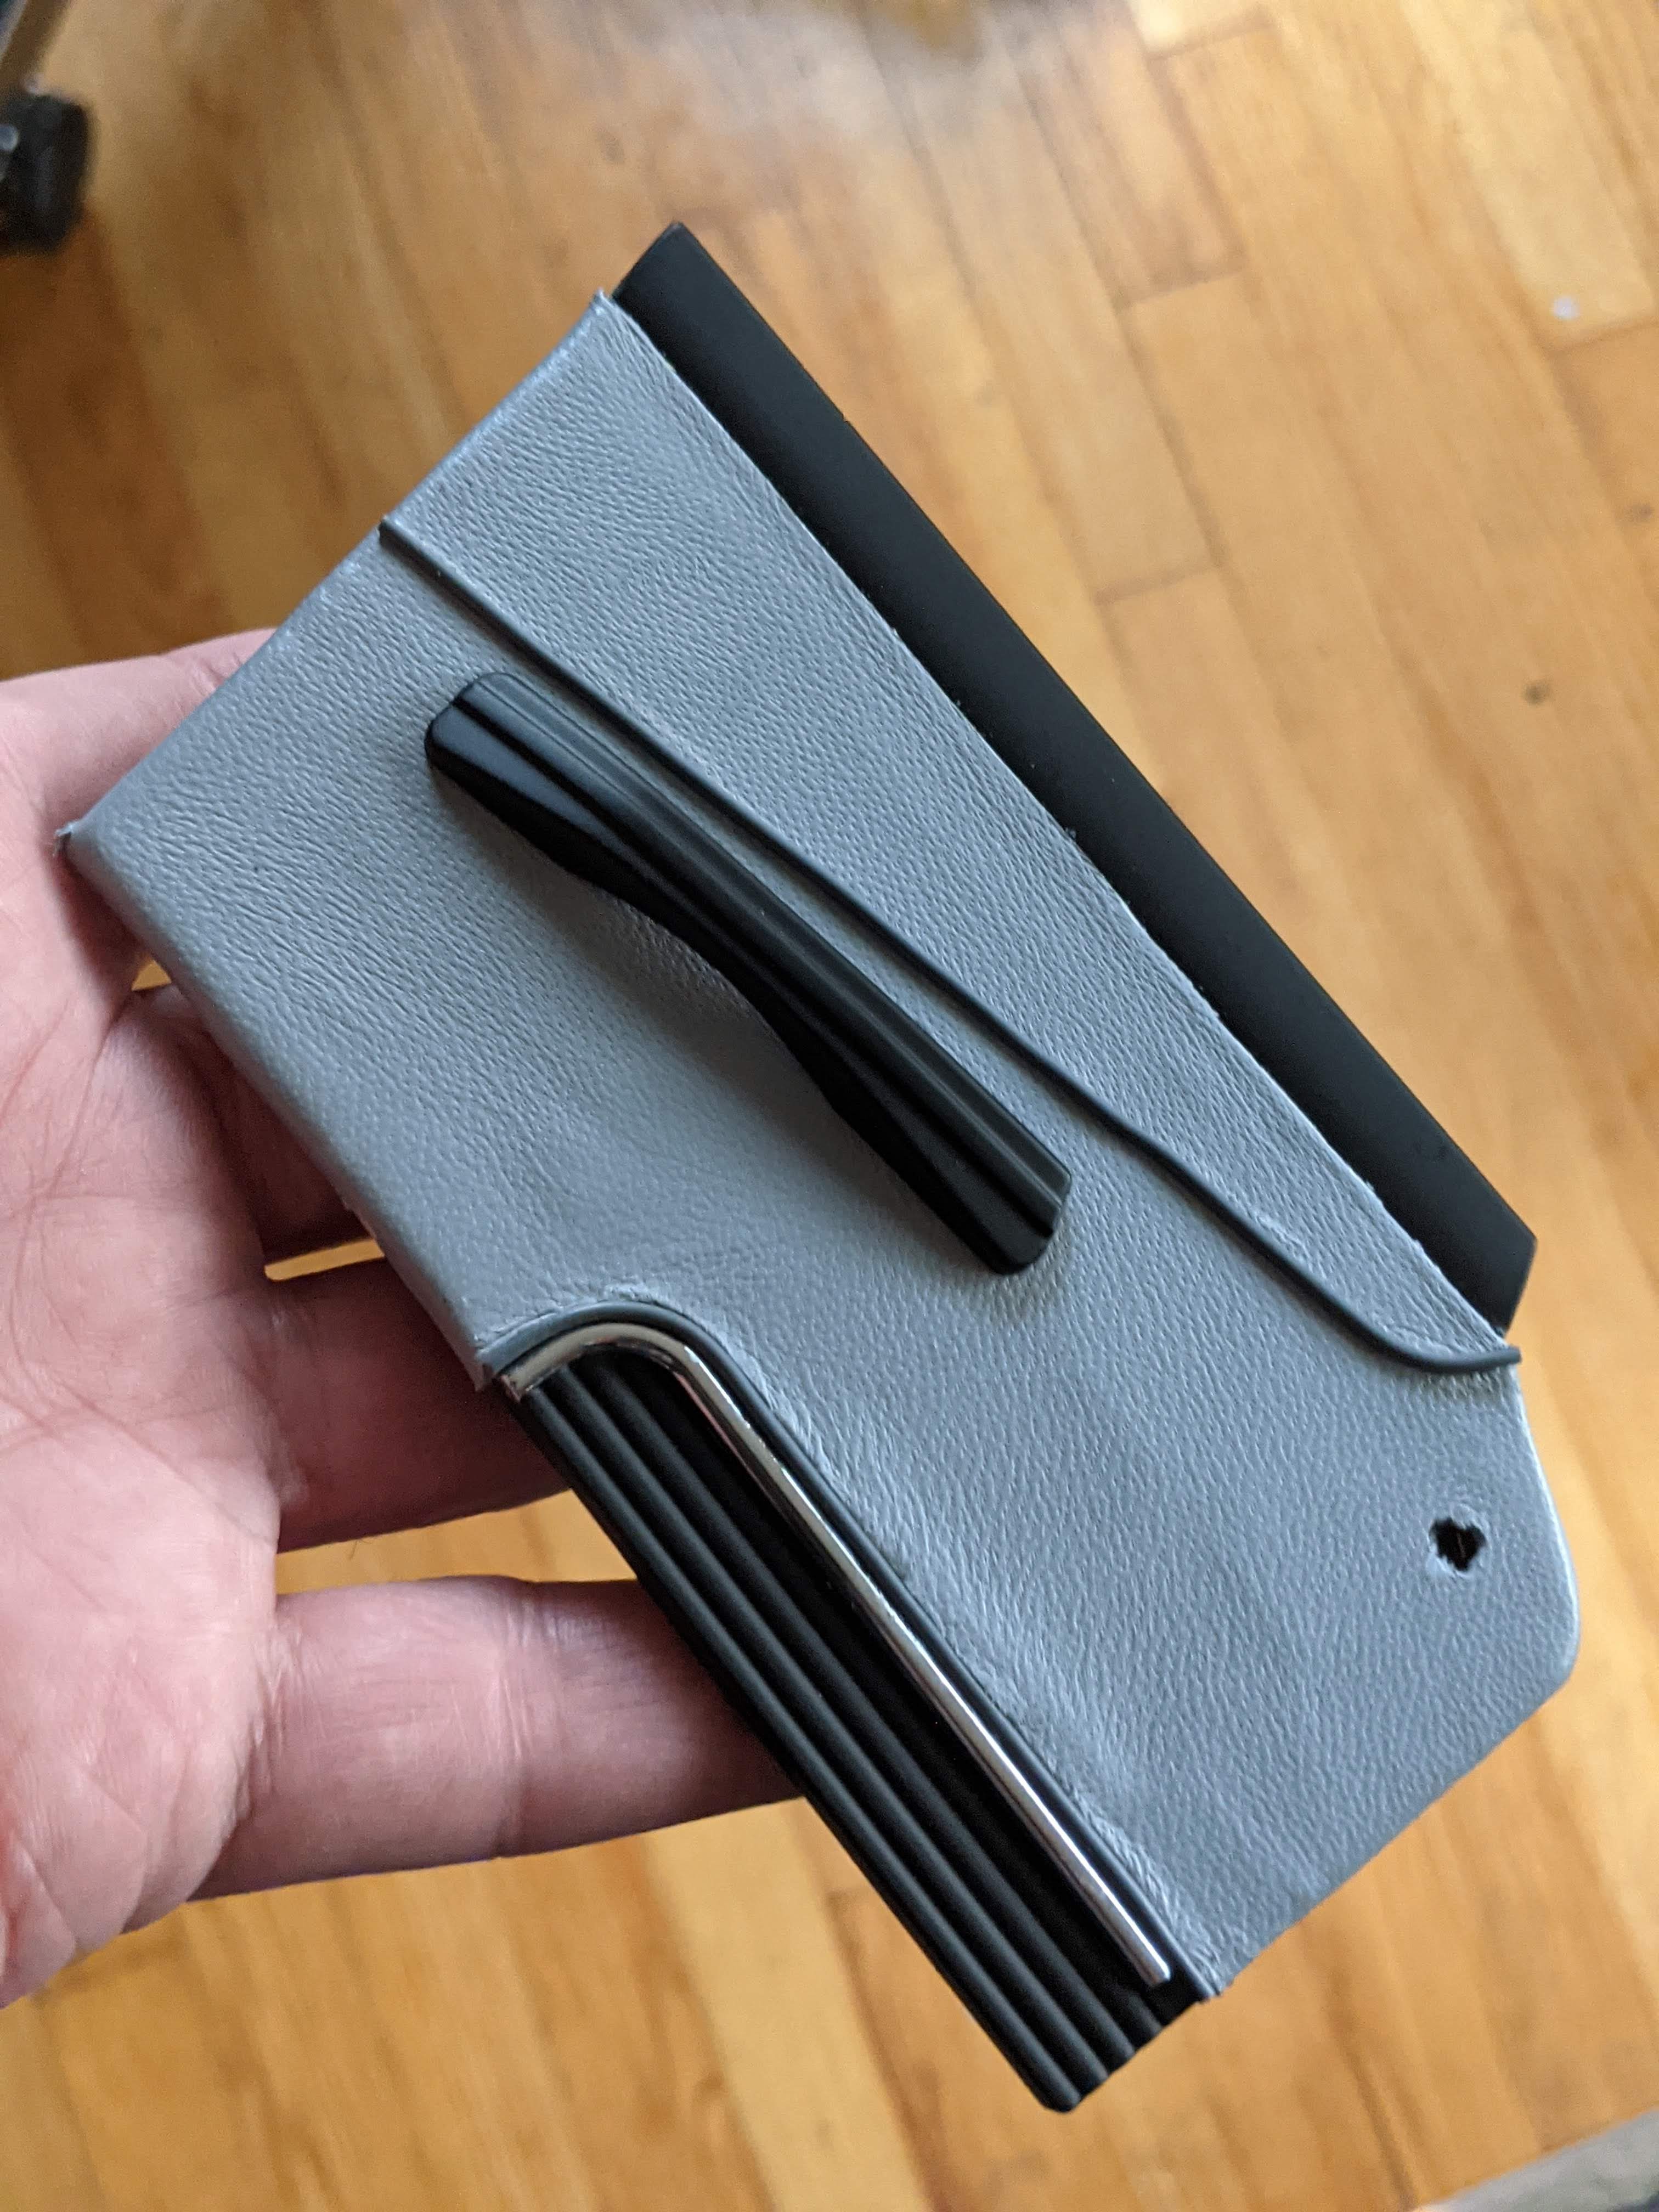
First, the mechanism itself is tricky. The idea is that there is a catch for the screen. It is spring loaded and pops up when you slightly push it down. It latches again when you push the extended screen back into the car body (actually the trunk lid on the model, as an aside I think it was in the cat body above the truck lid on the real car, but that's neither here nor there).
There were a couple of issues. One was that the latch did not fully engage with the guides on the shield so it would not release/catch correctly. The screen could slip past it and not catch, or just pop out on its own. Secondly, I felt like the top of the shield, when down, as a little low, below the contour of the car body. I fixed both issues, more or less, by making a new latch, shown in the first image. The upper part is from the kit, the lower one is my replacement. I used a stronger, thicker, steel material and made it longer by about a mm so the shield sits higher. The shorter bent down part I also made longer so it fully engages the guides on the shield. The longer downward bend is where the part mounts. I made that longer too so it will be more secure. This improved the latch significantly.

The problem is that the trunk lid posts on mine are significantly closer together than the holes in the shield assembly that they are supposed to go into.
I ended up shaving the sides of the holes in the plastic at a bevel so that the posts could be forced in and squeezed down to line up the screw holes. The trunk and the plastic both flexed some, but I got it in place. Fortunately the plastic they use for these things is very strong.

By the way, yes that license plates also rotate, as on the actual 007 car.
See all the posts for this project here.
 Assembly of the trunk lid and the pop-up bullet proof screen in the rear bring me to the end of the parts I currently have on hand. More on the way...
Tuesday, December 28, 2021
Eaglemoss 1:8 Scale Aston Martin DB5, Part 17, Back Seat

The odd assembly sequence on this model makes this rather tricky. The seat and
the back of the back seat do not actually come together until very late in the
build. The seat bottom will be part of the interior assembly that I have
already done. The seat back will go into the top and back of the body along
with the parcel shelf, and parts of the trunk. The side parts of the seat are yet another separate
stage. They do not all come together until the body is assembled. It had better
fit. I can't really test this.
The leather will add something between .5 and .75 mm to any contact face of
the parts it covers. I have to more of less guess at where to grind down the
plastic before covering it, to make things fit when they come together later. The surfaces do not have to be neat and smooth since they are covered.

 Various sanding and grinding done, the way to do the leather is to secure it down the middle and work
outward. I pull the leather and glue it down into each pleat in the
plastic.
Various sanding and grinding done, the way to do the leather is to secure it down the middle and work
outward. I pull the leather and glue it down into each pleat in the
plastic.
 At the ends I apply glue, then pull the leather very hard over the edge to
avoid any extra folds as much as possible. You can pull very hard on this
stuff and it will conform. Holding to taught for a few seconds is just enough for the glue to grip. The leather gets thinner of course when stretched, which is also good.
At the ends I apply glue, then pull the leather very hard over the edge to
avoid any extra folds as much as possible. You can pull very hard on this
stuff and it will conform. Holding to taught for a few seconds is just enough for the glue to grip. The leather gets thinner of course when stretched, which is also good.
 Seat and center bit done. These mount to the
interior assembly already built, here.
Seat and center bit done. These mount to the
interior assembly already built, here.

Thursday, December 23, 2021


Wednesday, December 22, 2021
Eaglemoss 1:8 Scale Aston Martin DB5, Part 16, Left and Right Rear Windows


This really doesn't work though as the clamp is far too tight. I experimented with the fit and determined that if I were to alter the part to allow the door to open, it would be really sloppy and loose when opening anyway. So I'm just going to leave it as-is. The fuel fill doors won't open.
 On to the two rear quarter side windows. These were ticky.
Firstly, the parts are come in a pack together with no indication of which is left and which is right. However, in fact, all the parts in this assembly differ left-right.
The glass itself has an angled edge, especially apparent at the bottom. The edge matches the angles of the frame. The window tilts inward on the car, at the top. You have to look closely to see this difference.
The two pieces of the latch are also different left and right in a similar way. They are designed to assemble straight through, parallel to the ground as it were, as the window is angled. It is especially difficult to see this angle on the outside part of the latch.
The inside handle of the latch is actually marked 'R' and 'L' in letters so small you'll need magnification to see the letters.
When the outside piece is in place, it will not stay in snug on its own. The inside handle friction fits into it holding both pieces in place. The correct handle faces to the rear of the car with the angle on the end of the handle mirroring the angle of the window. The post on the interior part is keyed, and again, they're marked left and right, but it is very, very easy to miss this.


Note the handle's orientation on the inside.

Sunday, December 19, 2021
Eaglemoss 1:8 Scale Aston Martin DB5, Part 15, Even More Interior

This phase also includes the seat of the back seat. I will of course cover this part with leather, but I have to be very careful about the thicknesses. I'll have to shave down the plastic in areas to make sure it fits other parts.
The assembly sequence on this car is odd. The seat of the back seat goes in here, but the back of the seat gets installed in the rear part of the body. The seat comes together finally near the end of the project when the body is assembled.
The leather adds about .5 mm to the thickness of things. I have to be sure parts fit where ever there are mating surfaces. That's hard since I don't yet know exactly how the assembly works.
See all the posts for this project here.
Saturday, December 18, 2021

Friday, December 17, 2021
Eaglemoss 1:8 Scale Aston Martin DB5, Part 14, More Interior


The floor mats are still in progress separately. They will hide even more flaws once I put them in.

I don't know. It's good, not great.
See all the posts for this project here.

Sunday, December 12, 2021
Trumpeter Ford GT40 1/12 Scale, Part 16


On the right side there is suppose to be a tank of some sort on the firewall above the fuel pumps. I realized examining this part that earlier I had put one of the fuel lines into one of the locator holes for this tank.
Going back and looking at the instructions I found that the exact location where that hose goes is extremely vague. Where I put it looked completely correct at the time.

There are a few rough areas in this kit, and this is one of them. It now appear to me that the hose is supposed to just tuck through the framing below the hole to some out of sight location.
There is a hole there though. The line appears to pass through the bulkhead, rather than slip under it.

I'm not sure what I'll do. I might just leave that tank off. Not a whole lot of people are going to miss it and the whole engine area is crowded with detail.
See all the posts on this project here.
Friday, December 10, 2021

Thursday, December 09, 2021
Eaglemoss 1:8 Scale Aston Martin DB5, Part 13, More Leather


See all the posts for this project here.
Tuesday, December 07, 2021

Wednesday, December 01, 2021
Eaglemoss 1:8 Scale Aston Martin DB5, Part 12, Right Door Complete

I did a poor job on the leather on this side. Rushed it some I guess. And I managed to cut it incorrectly in a couple places. I did my best to hide the issues. I doubt I could get the stuff off again for a second go at it.
Anyway, on the finished model it should look fine. The thing is huge and there's a lot to look at. And the door, open, can only be seen at an angle.


No window on this side. It's all the way down I suppose.
See all the posts for this project here.
Tuesday, November 30, 2021

Saturday, November 27, 2021

Eaglemoss 1:8 Scale Aston Martin DB5, Part 11, Left Door Complete

The door is metal and quite heavy. It'll have a very solid feel on the final model.


The window on this model is fixed, half down. That's fine, it looks pretty good.
See all the posts for this project here.
Friday, November 26, 2021
Eaglemoss 1:8 Scale Aston Martin DB5, Part 10, Interior Door Panels

I had already committed to a grey leather interior so this would have to be covered anyway. The area along the top of the door is, as far as I can tell, painted gloss on the real car, matching that area above and around the main instruments on the dash. The area below the pocket is likewise a black material, probably painted but possible rubber or plastic. The rest needs to be the interior grey leather, including the armrest.

Note how huge the molded bulge is. What's the deal with that?
Anyway, I trimmed a piece of tape to this shape so I can find it later on both doors.


The armrest is yet to be covered. It's just loose fit in place here. And the leather color is different in different light, later in the day.


Here's the finished left door panel in a very unforgiving close up photo. I think it will look pretty good in the car though. And the pocket is real so there's a good place for Bond to stash his fake passports, microfilm and pistol or whatever.
I've never done anything like this before, the leather work that is. It's not as difficult as one might think, at least to get a somewhat flawed but pretty good at a glance result. It feels like the sort of thing one could get good at and really make a difference in the finished product. I'm certainly glad I did it.
See all the posts for this project here.
Subscribe to:
Posts (Atom)